CONTINUED
Here's the finished product. The reliefs have been just "touched" by a 60 grit cartridge roll and a tiny radius has also been placed on the bottom of the cylinder bore. This will make the transition back up the cylinder wall a little less "wearing" for the pistons' skirts. The block has been thoroughly cleaned with a solvent and then it's been scrubbed with hot soapy water, prior to the final rinse with hot water. Blow the block dry, including all the bolt holes. Make a good sized roll of Bounty towels on some sticks (paint stirrers work great), spray them with some WD-40 and wipe the cylinder bores until there's no hint of dirt, or surface rust showing.
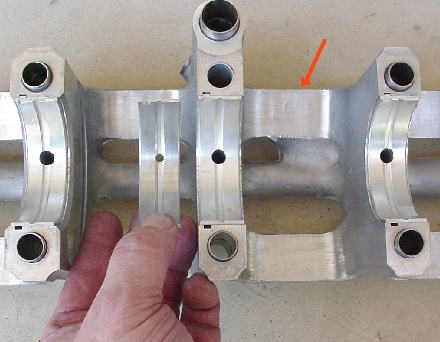
I catch a lot of flack about the size I open the oil holes in the bearings out to. Those who don't care for the practice, have never apparently experienced oiling problems, or they've never made enough power to be concerned. We open the oil holes in the bearings, after fitting the bearings to the block/crank with micrometers / dial-bore gauges and finally Plasti-Gage.) The holes are in perfect alignment with the feed holes in the main caps...and oddly enough, they're darned near the same diameter as the oil holes in the crankshaft. Who'd have thought? Also of note, we grind the edges of the girdle to remove any radius. That might sound strange, but sharp edges will "shave" oil off the rotating crankshaft and rod assembly with considerable efficiency and that's very desirable for a performance engine. It's also free, if you have a little time to spend.

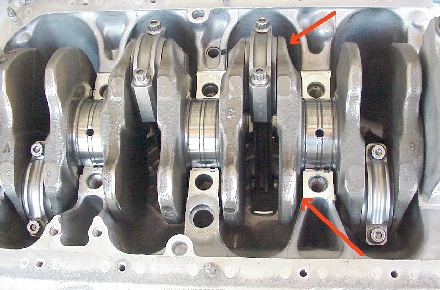
Do yourself and the piston rings a favor and use a scissors-band-style ring compressor for piston/rod installation. Most of the cheapie ring compressors are good at damaging, or breaking rings and you won't find out until the engines in the car, running, and smoking.
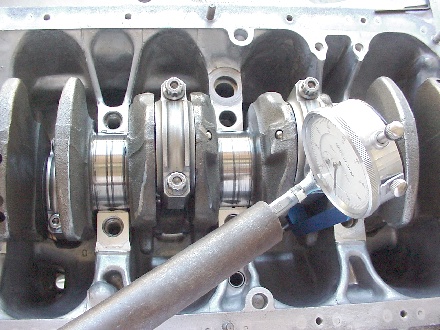
While they aren't visible in this picture, we use a couple main caps that we've cut from an old D16 girdle at the #1 and #5 main to hold the crankshaft in while we're torquing the rod caps. The D series girdle leaves little room for the rod bolt stretch gauge and this is one area where correctly stretched bolts are important. I also use a steel tube placed on the end of the 3/8" 12 point wrench to permit me to "pull" the bolt to the correct length in one smooth motion. We usually torque the bolts to 15 foot pounds, to seat the rod cap and follow up by loosening them to about 5 foot pounds and stretching them to the instructed dimension with the gauge.
It's not terribly visible in this picture, but you can see that we've "cleaned-up" this crank's surfaces considerably. In addition to X-Raying the crank and looking for surface flaws, the crank's oil holes have all been carefully chamfered and all the balancing was accomplished by radiusing material off the counter weights and throws, rather than drilling more holes. The crank has also been thoroughly stress relieved, as the application is one placing it under considerable "pressure." I should also note that this engine isn't configured to rev past 7,500 rpm, so extensive crank lightening wasn't part of the plan, as it would be for a normally aspirated engine.
This about sums up the tips for the D series bottom ends. We didn't show it, but we do open the diameter of the main oil gallery on the side of the block and we also do considerable radiusing of it's intersect with the oil filter housing.
Make sure that you clean the threads in all the bolt holes that perform critical tasks. Use either new bolts, or studs where available. I also recommend using some high pressure engine building graphite-moly on the threads, prior to torquing and don't forget to lube the washers as well.
Please send all comments to the staff address and we'll attempt to make the next article the way you guys request.
Borrowed from Endyn... 10 Second D16 Motor i believe?