D Series Engine Building Tips
Building D series and ZC Honda engines is a pretty straight forward task. As with any engine build-up, all clearances must be worked out well in advance of the final assembly process, enabling the assembly to take place like a model kit.
A clean assembly environment is also essential for a successful build-up. I recommend doing assembly in a closed area (not outside), where there's little or no dust. If it's in a garage, I recommend hosing down the floor and anything else necessary to keep airborne particles to a minimum.
An engine stand is certainly a help when it's time to install pistons and another pair of hands doesn't hurt either. Keep a couple large rolls of Bounty paper towels on hand and use them instead of rags for wiping and cleaning.
The first picture series is some pretty basic stuff that makes sense. The mods are configured to improve the efficiency of the oil pump. While there are several internal tricks, we're showing some things here that are easy to do and they won't ruin the pump, if you're a little bit off with the grinder.
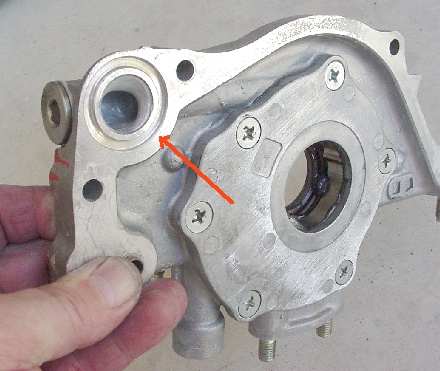
Note that the oil exit in the pump has been radiused into the passage and it's also been flared to match the oil gallery diameter in the block. While it's not visible here, we fill the area behind the allen plug at the end of the pump's exit passage to smooth the flared turn's back wall. A good aluminum based epoxy will work fine for the job. Make sure that you disassemble the pump prior to doing these mods, so there's no grinding material left inside.
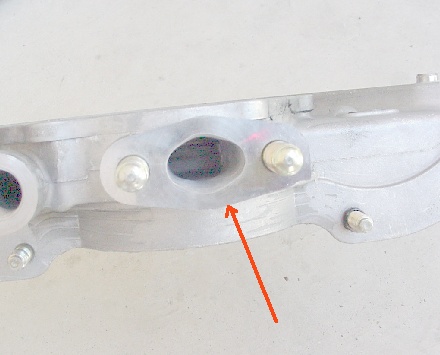
While it's difficult to see in this photo, we smooth the entry passage into the pump and carefully radius the transition into the actual pump housing to increase area and improve oil flow. We also make sure the pick-up tube is matched correctly to the pump, with no sharp lips to disturb the flow.
Block notching seems to be another thing that many builders are unsure of. It's an easy process and here are a few tips on how-to-do it properly.
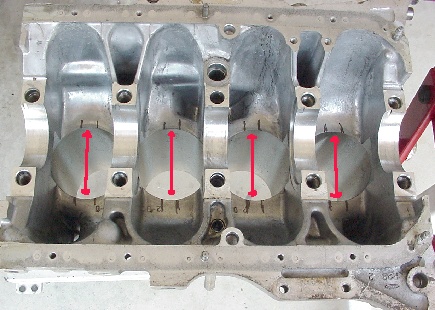
We mark an area that's 3/4" wide and approximately centered on each side of the block's cylinder bores. 3/4" is plenty of distance to clear the rods' beams ans we'll taper the cut from outside the lines back to the cylinder bores. If you put a mark that's 1/4" into the block and 1/4" down into the bores, that's the amount you'll be removing...effectively straight-lining the area with your grinder.
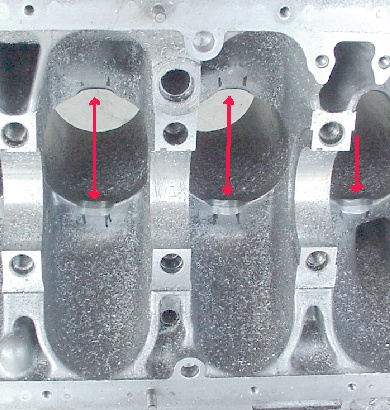
This photo shows the block after about 10 minutes with a die grinder and a carbide cutter. Notice how the corners of the reliefs are tapered back to the original lower edge of the cylinder. You do not want square edges in these areas, as stress risers could develop. make sure when you're grinding in these areas on the block that you wear eye protection, as the cast iron particles from the cylinder liner will rust in your eyes and having them "drilled" out, isn't a pleasant experience. Obviously, the block will need to be cleaned after this operation, as is evidenced by the grinding debris in the photo.
